Growing tomatoes from seed for the first time is an emotional rollercoaster. One day you’re celebrating a tiny green sprout, and the next, you’re staring at a tray of stunted, yellowing plants wondering where it all went wrong.
If your seedlings have stopped growing, or if you’ve noticed white mold and tiny flies, you aren’t alone. I’ve made every mistake possible this season, but through the struggle, I’ve learned exactly how to identify and fix overwatered seedlings.
Identifying Overwatered Seedlings: Warning Signs & Symptoms
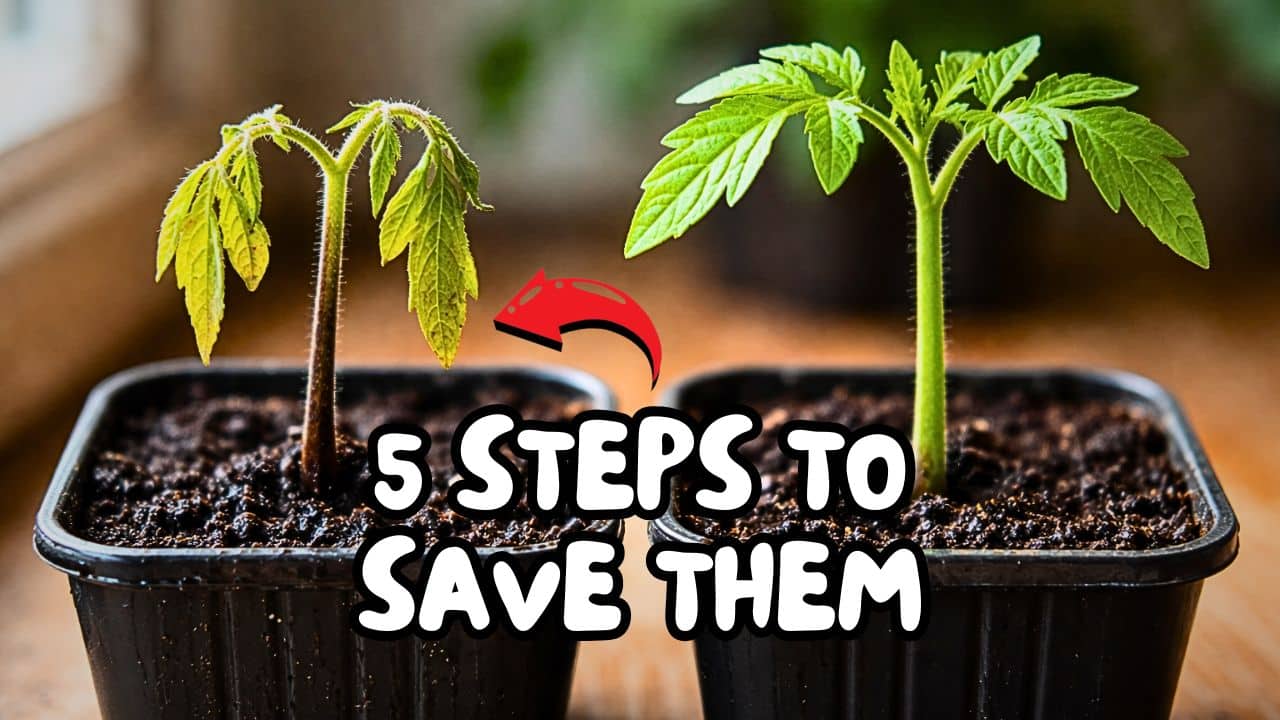
I realized something was wrong when I noticed a massive size difference in my tray. Some plants were three times larger than others, despite being planted on the same day in the same conditions.
If you suspect your plants are struggling, look for these “red flags”:
- The “Brick” Test: Press the sides of your pot. If it feels rock hard, your soil is too compact. Roots can’t breathe or move in a brick of mud.
- Fungus Gnats: If tiny flies swarm when you move the pot, you have a moisture problem. They lay eggs in wet soil, and their larvae eat your plant’s roots.
- White Mold: Fluffy white growth on the soil surface or the bottom of the pot indicates zero airflow and constant saturation.
- Stunted Growth: If your tomatoes haven’t put out a new leaf in weeks, they are likely suffocating.
Why “Standard” Soil Might Be Killing Your Plants
The biggest lesson I learned? Basic universal potting soil is often too heavy for seedlings. It’s dense and holds onto water like a sponge. When soil is that compact, water doesn’t drain—it just sits there. Combined with sitting pots flat on a tray (which blocks drainage holes), you create a “drowning” environment.
Pro Tip: If your room is cool (below 18°C) or your lights aren’t bright enough, the plants drink even less, making the overwatering cycle even deadlier.
The 5-Step Rescue Plan for Overwatered Seedlings
If you’ve caught the problem in time, there is hope. Here is the emergency protocol I’m using to save my tomato crop:
1. The Gentle Extraction
Carefully remove the seedling from the compact soil. If the soil has hardened around the roots, you’ll feel resistance. Go slowly—you don’t want to snap the few healthy roots that are left.
2. The Root Inspection
This is the moment of truth.
- White roots: There is hope! Proceed to step 3.
- Brown/Mushy roots: This is root rot. These plants are likely too far gone for the compost bin.
3. Repot into a Light Mix
Switch to a specific repotting mix or a seed-starting formula. I highly recommend mixing in perlite (those little white volcanic rocks). Perlite creates air pockets in the soil, ensuring that even if you get a little heavy-handed with the watering can, the roots can still breathe.
4. Switch to Bottom Watering
Stop pouring water over the top. Instead, place your pots in a tray with an inch of water and let the soil wick the moisture upward. This prevents the surface from becoming a muddy mess and keeps the soil structure light and airy.
5. Elevate and Ventilate
Don’t let your pots sit flat on a solid surface. Place them on a wire rack or grid to allow airflow underneath the drainage holes. If you can, set up a small fan. Air circulation dries the soil surface (killing fungus gnat larvae) and strengthens the plant stems.
Will They Survive?
Gardening is a learning process. Some of my seedlings might not make it, but the ones with healthy white roots now have a fighting chance thanks to better drainage and lighter soil.
What about you? Have you ever managed to stage a comeback for your overwatered seedlings? Let me know your tips in the comments below!