If you’ve been growing your seedlings indoors, under grow lights, in a nice warm house or apartment—this article is for you. There is one crucial step that most beginner gardeners completely skip, and unfortunately, it can destroy weeks of meticulous work in just a few cold nights. It is called hardening off seedlings.
Rushing this process means gambling with your crops. Let’s look at exactly why this transitional phase is completely non-negotiable and how you can master it step-by-step.
What is Hardening Off Seedlings and Why is it Mandatory?
When your crops grow indoors from seed, they spend their early weeks living in a highly controlled, artificial bubble. They enjoy perfectly stable temperatures, zero wind resistance, and consistent artificial light. The outside world, however, is a completely different reality. Natural sunlight is infinitely more intense than indoor LEDs, ambient temperatures can plunge sharply at night, and outdoor winds physically buffet and stress the plants.
Hardening off seedlings is the deliberate process of introducing your indoor-grown plants to outdoor conditions gradually, ensuring the transition doesn’t shock, stun, or kill them. Think of it like taking someone who has been resting indoors all winter long and slowly re-introducing them to running outside again. You wouldn’t expect them to run a marathon on day one; your plants require the same patient, incremental training.
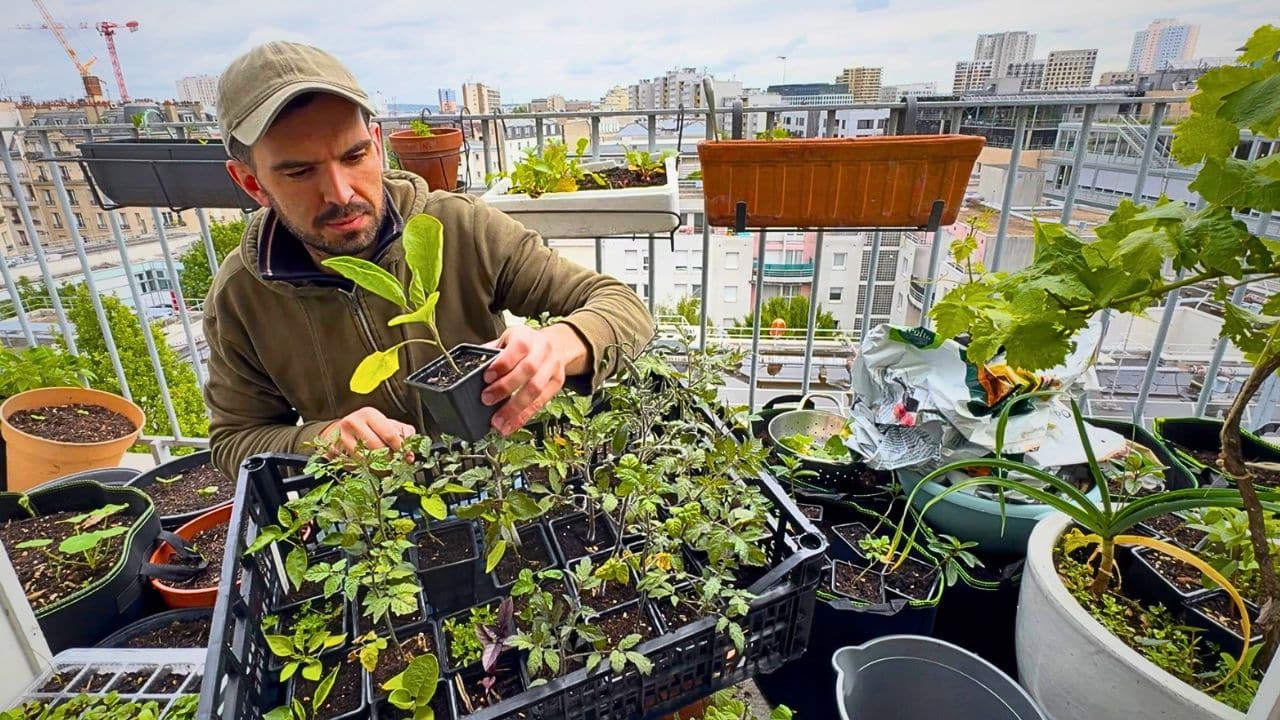
If you are fortunate enough to grow in a dedicated greenhouse, you enjoy a bit more environmental flexibility. But if you are like me—growing crops strictly indoors under grow lights with absolutely no greenhouse space—this step is mandatory. The environmental gap between an indoor shelf and an open balcony or garden bed is massive. Rushing this process by even a couple of days can wipe out your entire seasonal inventory. I’ve seen other gardeners lose everything just from being impatient by a few days, and I didn’t want to be that person.
Timing Your Transition: Regional Microclimates and “Les Saints de Glace”
This spring, my hardening-off list included heavy-feeding summer favorites: tomatoes, peppers, eggplants, and cucurbits (melons and watermelons). All of these were started from seed indoors under lights during the late winter months.
In temperate climates, the universal rule of thumb is to begin the hardening process roughly two weeks before your region’s average last frost date. That way, you aren’t rushed, and you maintain a buffer to react if an unexpected cold snap returns.
For instance, here in Paris, the classic gardening wisdom revolves around the Ice Saints (les Saints de Glace), which fall between May 11th and May 13th. Conventional advice suggests waiting until these dates pass before planting out warm-weather crops.
However, microclimates matter more than calendar dates. This year, even after the Ice Saints passed, the nighttime temperatures remained punishingly cold. Instead of blindly following the calendar, I monitored the real-time weather data and pushed the entire timeline back. Paying close attention to actual nighttime minimums will save your crops from stunted growth.
The Day-by-Day Hardening Off Protocol
Below is the precise step-by-step training schedule that successfully protected my crops this season. Feel free to bookmark or screenshot this guide for your own spring transition!
- Days 1–2: Start with 1 to 2 hours outside in a fully sheltered, shaded location during mild morning hours. Avoid any direct afternoon sun or strong wind. Bring them right back inside afterward.
- Days 3–4: Increase the time to 3 to 4 hours. Introduce 1 hour of filtered or early morning direct sunlight. Allow exposure to very gentle breezes to stimulate stem strength.
- Days 5–7: Work up to 5 to 7 hours. Move the plants into mid-day sun. Trays can now remain outside for the majority of the daylight hours, but must come back inside before temperatures drop in the evening.
- Days 8–10: Keep plants outside for all daylight hours (from dawn until dusk). Begin testing their resilience against moderate ambient wind and light spring showers.
- Days 11–14: The 24-Hour Cycle. Leave plants out overnight continuously, provided that localized temperatures satisfy safe baseline thresholds.
The Critical Nighttime Temperature Rule
When deciding whether to leave your pots out overnight during the final phase, look at your weather metrics carefully. The mathematical rule of thumb I used for my delicate crops was:
- Nighttime Temp > 8°C: Leave Outside
- Nighttime Temp ≤ 8°C: Bring Indoors
If the forecast predicts the overnight temperature will fall to 8°C (46°F) or below, bring your trays back indoors. This rule is absolute for sensitive crops like basil, tomatoes, and chili peppers. They are notoriously sensitive to cold drafts and will exhibit immediate leaf yellowing or stalled root growth if exposed to prolonged cold chills.
Once your plants successfully complete their two-week outdoor acclimation and overnight temperatures steady into reliable warmth, the hardening phase wraps up. Your crops are officially ready for their permanent summer containers, raised beds, or balcony pots.
The forecast here is finally looking excellent with several days of uninterrupted sunshine ahead, so this week, everything goes into its final home. The season is officially starting!