Growing your own food is a dream for many, but not everyone has a sprawling backyard. Fortunately, learning how to plant potatoes in containers is the perfect solution for urban gardeners. Whether you have a patio, a small deck, or, like me, a sunny balcony, you can produce a massive harvest of delicious spuds in a very small footprint.
In this guide, I’ll walk you through the entire process, from choosing the right tubers to the final harvest.
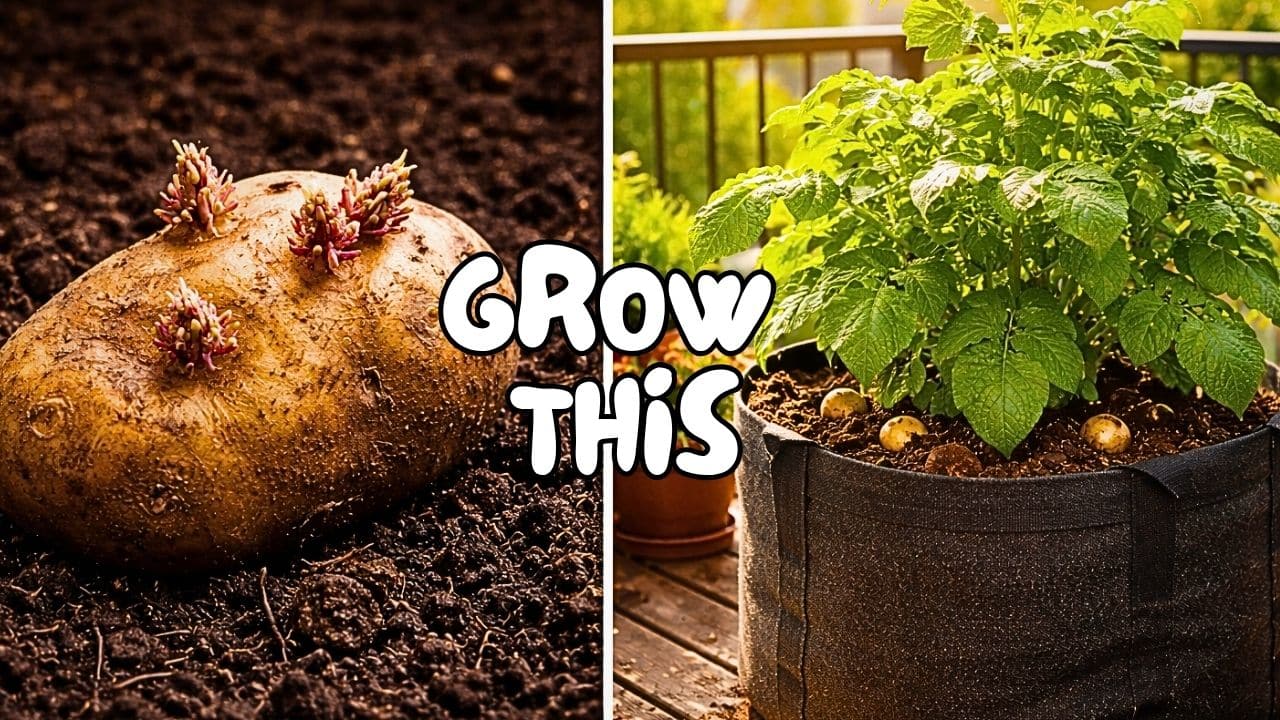
Why Grow Potatoes in Pots?
If you’re wondering if it’s worth the effort, the answer is a resounding yes. Container gardening offers:
- Control: You choose the soil quality, preventing diseases like scab.
- Ease: No heavy digging or tilling required.
- Protection: It’s much harder for pests like slugs or moles to reach your crop.
How to Plant Potatoes in Containers: Step-by-Step
To get the best results, follow these specific steps to ensure your plants have enough room and nutrients to thrive.
1. Select the Right Container
For a successful harvest, size matters. You need a container that holds at least 10 gallons (38 liters). You can use:
- Fabric Grow Bags: These are excellent because they allow the roots to breathe.
- Plastic Buckets: Just make sure to drill plenty of drainage holes in the bottom.
- Large Ceramic Pots: These look great on a balcony but can be heavy to move.
2. Prepare Your Seed Potatoes
Don’t use potatoes from the grocery store, as they are often treated with growth inhibitors. Buy certified seed potatoes.
- Chitting: Place them in a cool, bright spot for 2-3 weeks to let sprouts (eyes) develop.
- Cutting: If the potatoes are large, cut them into pieces, ensuring each piece has at least two “eyes.” Let them dry for 24 hours before planting.
3. The Planting Process
Start by filling the bottom 4 to 6 inches of your container with a high-quality potting mix enriched with compost.
- Place your seed potatoes on the soil with the sprouts pointing up.
- Space them about 6 inches apart. In a standard 10-gallon pot, 2 to 3 seed potatoes are plenty.
- Cover them with another 4 inches of soil.
4. The Hilling Method
As your potato plants grow to about 6-8 inches tall, you need to add more soil. This is called hilling. Cover the stems halfway up with more potting mix. Repeat this every few weeks until the soil reaches the top of the container. This technique forces the plant to grow more potatoes along the buried stems.
Caring for Your Container Potatoes
Watering and Sunlight
Potatoes are sun-lovers. They need at least 6 to 8 hours of direct sunlight daily. Since I grow mine on a balcony, I make sure to place them in the sunniest corner.
Containers dry out faster than the ground. Check the soil daily; it should feel like a damp sponge. If the soil gets too dry, your potatoes will stop growing.
Fertilizing for Success
Since potatoes are heavy feeders, mix in a slow-release organic fertilizer at the start. Once the plants are well-established, a liquid seaweed fertilizer every two weeks will help maximize your yield.
When to Harvest Your Potatoes
The fun part! Here is how you know they are ready:
- New Potatoes: About 2-3 weeks after the plant finishes flowering, you can “fizzle” (reach in) and grab a few small, tender potatoes.
- Full Harvest: When the foliage turns yellow and dies back, stop watering and wait a week. Then, simply tip the container over onto a tarp.
Troubleshooting Common Issues
- Yellow leaves: This could be a sign of overwatering or a lack of nitrogen.
- Small potatoes: Usually caused by overcrowding or the soil getting too hot. If your balcony gets baking hot, try to insulate the pots or move them into partial shade during the peak of summer.
Are you ready to try growing your own potatoes this season? If you have any questions about the setup I showed in the video, drop a comment below!